
In this post we are going to describe how we developed an Angular 7 application as a front end to our Elasticsearch based master data for fishing vessels that we described in this blog post
The purpose of this app was to showcase the back-end service that we had created with Elasticsearch, rather than create a production ready stand alone application for public deployment.
The scope of this post is to describe how we used Angular with Elasticsearch and not as a guide to developing in Angular in general. To learn about Angular development in general, the docs here are an excellent starting point.
The code for our finished application can be found here.
Adding Elasticsearch to an Angular project
The Elasticsearch client can be installed via NPM:
npm install elasticsearchMore detailed documentation on the client can be found at npmjs.com
Essentially this client allows us to map inside the Angular app our calls to the Elasticsearch REST api. Once you’ve installed the package, remember to add the package in the dependencies part of the package.json file:
  "dependencies": {
 ---
    "elasticsearch-browser": "^15.1.1",
----
  },
Next generate a service for your project:
ng g s elasticsearchInside the service file we create our connection client with a ping method for testing our connection. Note we pass in our base URL from an assets file. In your initial development could just hard code in the base URL.
import { Injectable } from '@angular/core';
import { Client } from 'elasticsearch-browser';
import * as elasticsearch from 'elasticsearch-browser';
import esServerUrl from '../assets/urls/env-specfic.json';


@Injectable({
  providedIn: 'root'
})
export class ElasticsearchService {

  private client: Client;
  private esurl = esServerUrl.esserver;


  constructor() {
    this.esurl = esServerUrl.esserver;
    if (!this.client) {
      console.log('this is my url from env-speficjson' + this.esurl);
      this._connect();
    }
  }

  private _connect() {
    this.client = new elasticsearch.Client({
      host: this.esurl,
      log: 'trace'
    });
  }

  isAvailable(): any {
    return this.client.ping({
      requestTimeout: Infinity,
      body: 'Ping from ES is good'
    });
  }
At this point you should be able to serve out your app and check that you are connected to the Elasticsearch instance in your browser console.

Adding Search Methods
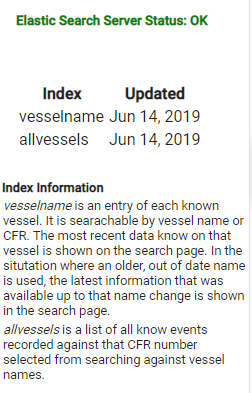
The first method we added was to get the date of last update for the indexes.
  lastUpdate(): Observable<Eslastupdate[]> {
    return this.client.cat.indices({
      h: 'index, creation.date.string',
      format : 'json'}
    );
  }
This data is displayed to the user in a material sidenav container.
The next search we implemented was the method that would be called by the autocomplete function that we were going to implement in the GUI.
  fullTextSearch(myIndex, myType, queryText): Observable<VesselSource[]> {
    return this.client.search(      {
      index: myIndex,
      type: myType,
      body: {
      size: 50,
       query: {
        bool: {
          must: {
        multi_match : {
          query:  queryText,
          fields: [ 'VesselName.trigram', 'ExactName^10', 'cfr' ],
          fuzziness: 'AUTO'
        }
        },
        should: [{match: {CountryCode: 'IRL'}}]

      }
     }
    }
  });
  }
This search would search against three fields in our selected index (value passed from our search-vessels.ts component). Notice the ^10 score boost given to the ExactName field. As mentioned in our previous blog, we had searches against multi-word vessel names where the exact name match would not be the top result returned. By giving a score boost to an exact match we ensured that exact matches scored higher than partial matches. For the reasoning why some multi word searches or trigrams would return a higher score its worth reading through the Elasticsearch documentation
We wanted to show identifying information such as size about a vessel as a user types in the vessel name so we used the UI design above rather than a more traditional autocomplete UI that you typically find in a Google search box.
For how we took the user input and displayed back the search results to the user, we created three components – check the vessel folder.
The next search then was the history of an individual vessel, which we called events. This was a very straightforward search where we passed in the CFR number from the vessel search and returned a list of events for that vessel from Elasticsearch.
  getEvents(myIndex, myType, myCFR): Observable<EventsSource[]> {
    return this.client.search<EventsSource[]>(
      {
        index: myIndex,
        type: myType,
        body: {
          query: {
            match : {cfr : myCFR}
          },
          sort: [
            {EventEndDate: {order : 'desc'}}
          ]
        }
      }
    );
  }
With these two searches implemented, we had succeeded in showing how quick and responsive the Elasticsearch back-end was. By providing a google type search engine interface with an auto complete function that showed not only suggestions for vessel names but other identifying information as well, we were able to give an end user very useful and quick information for correctly finding a vessel from the fleet register. The second search, showing the history of that vessel, gives a taste of what this data can be used for. For example, after creating this demo application, we integrated this vessel search function into an existing Marine Institute app for recording contacts with vessel owners.

